Event Calendar
The Event Calendar shows all scheduled agency events - trainings, meetings, operations, drills, and more. From here you can view upcoming events, sign up for public events, respond to invitations, and check in when you arrive.
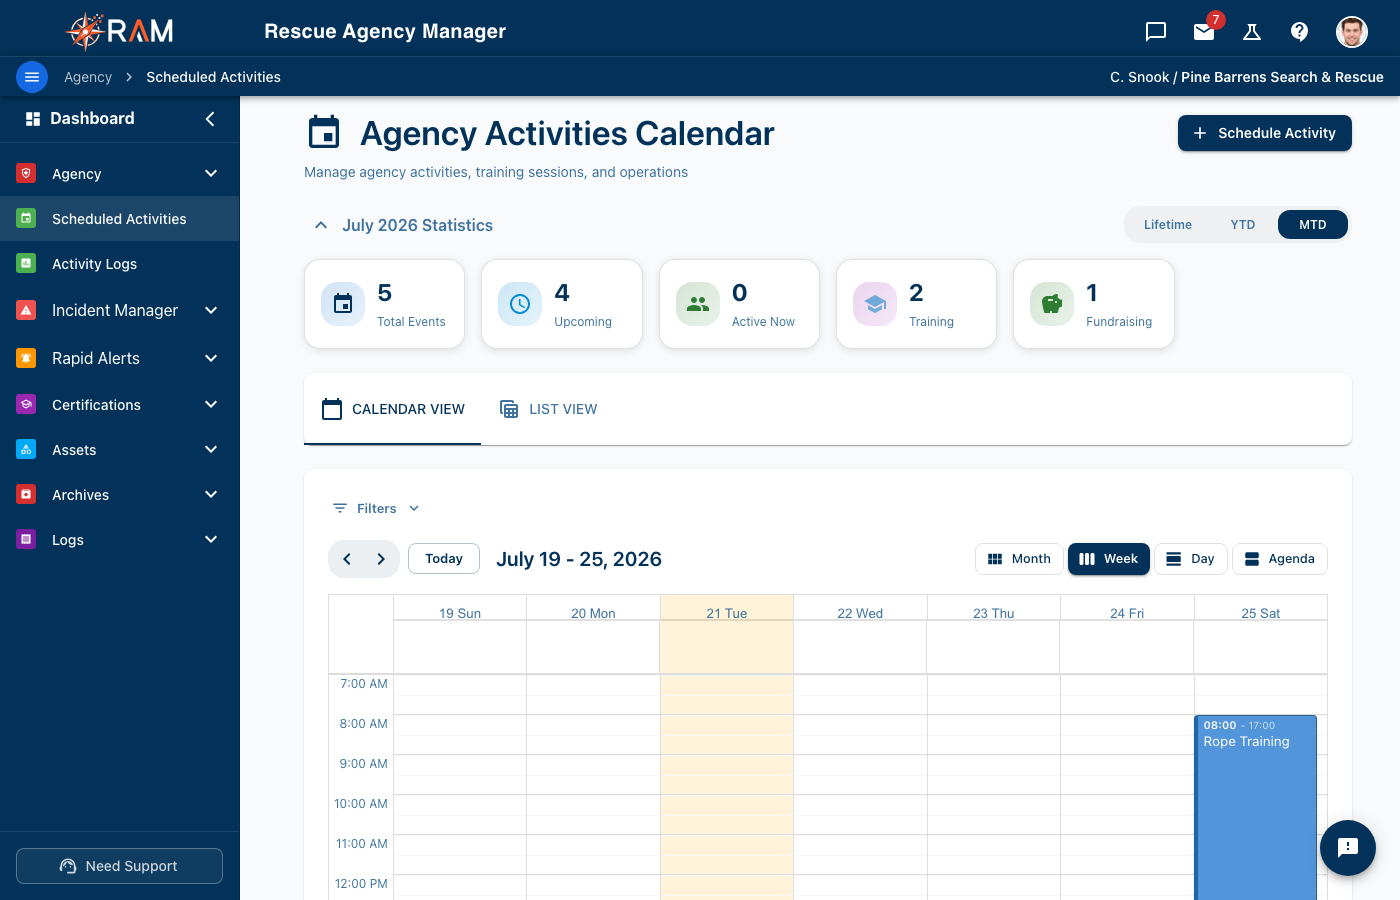
Accessing the Event Calendar
- Navigate to Activities > Calendar from the left sidebar
- The calendar loads showing the current month's events
The Event Calendar shows events you have access to. Public events are visible to all agency members. Invite Only events only appear if you've been invited.
Calendar Views
Switch between views using the buttons in the top-right corner:
| View | Best For |
|---|---|
| Month | Overview of all events across the month |
| Week | Detailed weekly schedule with time slots |
| Day | Single day view with hourly breakdown |
| Agenda | List-style view of upcoming events |
Use the navigation arrows to move forward or backward through time periods. Click Today to return to the current date.
Understanding Event Display
Events on the calendar are color-coded by their activity category:
- Each category has its own color for quick visual identification
- Event cards show the title and time range
- A lock icon indicates Invite Only events
- Participant count shows how many people are signed up
Event Status Indicators
| Indicator | Meaning |
|---|---|
| Normal display | Active, published event |
| Checkmark | Completed event |
| Strikethrough / grayed | Cancelled event |
Viewing Event Details
Click any event on the calendar to open the event details:
- Title and description of the event
- Date and time with timezone
- Location with map link (if set)
- Activity category for hour tracking
- Participant list showing who's attending
- Your status (Going, Pending, Declined)
Signing Up for Events
Public Events
For events with Public visibility:
- Click the event on the calendar
- Review the event details
- Click Sign Up or I'm Going
- You'll be added to the participant list
You can also sign up from My Activities > Add Activity > From Scheduled Event tab.
Invite Only Events
For invite-only events, you must be invited by an admin or event manager. When invited:
- You'll receive an email with event details
- The event appears in your calendar
- Click the event and respond with Accept or Decline
Responding to Invitations
From Email
- Open the invitation email
- Click Accept or Decline
- You'll be redirected to the app to confirm
From the App
- Find the event on your calendar (it appears with a pending indicator)
- Click the event
- Select Accept or Decline
Invitation Statuses
| Status | Meaning |
|---|---|
| Pending | You haven't responded yet |
| Accepted | You confirmed attendance |
| Declined | You declined the invitation |
Checking In to Events
How you check in depends on the event's check-in method:
| Method | How you check in |
|---|---|
| QR Code | Scan the QR code the organizer displays at the venue. |
| Manual | Tap Check Me In in the app — no QR needed. |
| QR or Manual | Either works — scan or tap Check Me In. |
Checking yourself in and out
On a Manual or QR or Manual event:
- Open the event (from My Activities or the calendar).
- Tap Check Me In at the top when you arrive.
- Once you're on scene, that button becomes Check Me Out — tap it when you leave.
QR Code Check-In
On a QR Code event:
- The event admin displays a QR code at the venue.
- Scan the QR code with your device.
- Your check-in is recorded with your GPS location.
You can check in starting 30 minutes before the event and until the event ends. If you see a "QR Required" message, the event is QR-only — look for the QR code displayed by the organizer.
Organizers can also check you in (or back-date a check-in you missed) from the Activity Sign-In Sheet. You can't be checked in for a time you were already checked in somewhere else.
What Happens at Check-In
When you check in, RAM automatically:
- Records your start time
- Captures your GPS location (if permitted)
- Calculates your distance to the event
- Creates an activity log entry (if the event has auto-logging enabled)
What Happens at Check-Out
When you check out:
- Your end time is recorded
- Duration is calculated from check-in to check-out
- Mileage is finalized (round-trip if GPS is available)
- Your activity log is updated with the final hours
Notifications
You'll receive notifications for:
| Event | How You're Notified |
|---|---|
| New invitation | Email + in-app notification |
| Event updated | Email (if opted in) + in-app notification |
| Event cancelled | Email + in-app notification |
| Upcoming reminder | In-app notification |
Managing Notifications
Configure your notification preferences in Account Settings:
- Toggle email notifications on/off
- Control which event types trigger alerts
Timezone Handling
Events display in your configured timezone. The system uses this priority:
- Your personal timezone (set in Account Settings)
- Agency timezone (set by your admin)
- Browser timezone (detected from your device)
- UTC (fallback)
Set your personal timezone in Account Settings for the most accurate event times, especially if you travel or work across time zones.
Filtering Events
Use the filter options above the calendar:
- Category filters - Click category chips to show/hide specific types
- Status filters - Show only Published, Completed, or Cancelled events
Common Questions
I don't see an event I was told about
- The event may be Invite Only and you haven't been invited yet. Contact the event organizer.
- Check that you're viewing the correct date range on the calendar.
I missed the check-in window
Contact your admin - they can manually check you in or create an activity log entry for you.
Can I sign up for a past event?
No, you can only sign up for upcoming events. If you need to log hours for a past event, use a manual activity entry in My Activities.
How do I cancel my attendance?
Click the event, then change your response to Decline. If you've already checked in, you'll need to check out first.
Related Documentation
- My Activities - Track your hours and manage activity entries
- Dashboard Overview - Your main overview page
- Account Settings - Configure timezone and notification preferences