Working on the Map
When you open a map, it fills the screen. The panel on the left lists what is on the map, and the round buttons on the right control the view.
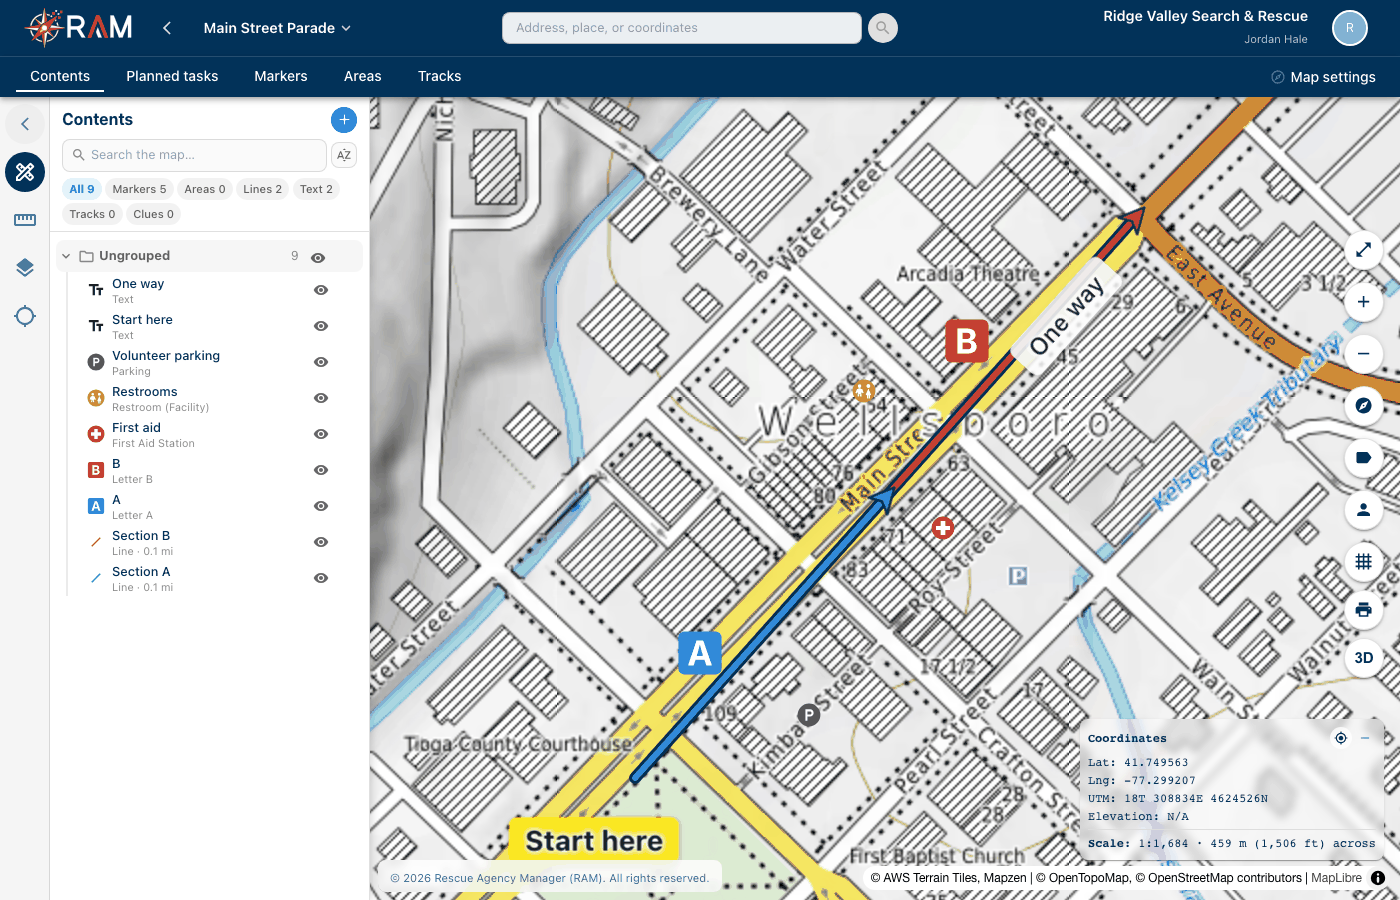
The parts of the screen
- The map name at the top left opens the map menu: map details, Import a map file…, Print to scale…, Sharing…, and starting or ending an operation.
- The tabs under it switch the left panel: Contents, Planned tasks, Markers, Areas and Tracks. While an operation is running you also see Check-In, Tasks and Log.
- Map settings, in the upper-right corner, sets how this map writes positions and bearings. See Map settings and access.
- The search box at the top finds an address, a place, or coordinates. You can type latitude and longitude, degrees-minutes-seconds, or UTM.
- The Coordinates box at the bottom right shows the position, elevation and scale under your pointer.
Adding to the map
Select + in the Contents panel, or Add to map in the left bar. With Contribute access you can add markers and clues. Everything else needs Create / Edit map content. The menu has three groups:
| Group | Items |
|---|---|
| Markers | Command Post, Staging Area, Point Last Seen, Last Known Position, Clue |
| Search & rescue | Search Area, Hazard Area, Boundary, Bearing line, Sector, Range rings, Buffer (SAR maps only) |
| Drawing | Marker, Area, Line, Text, Folder |
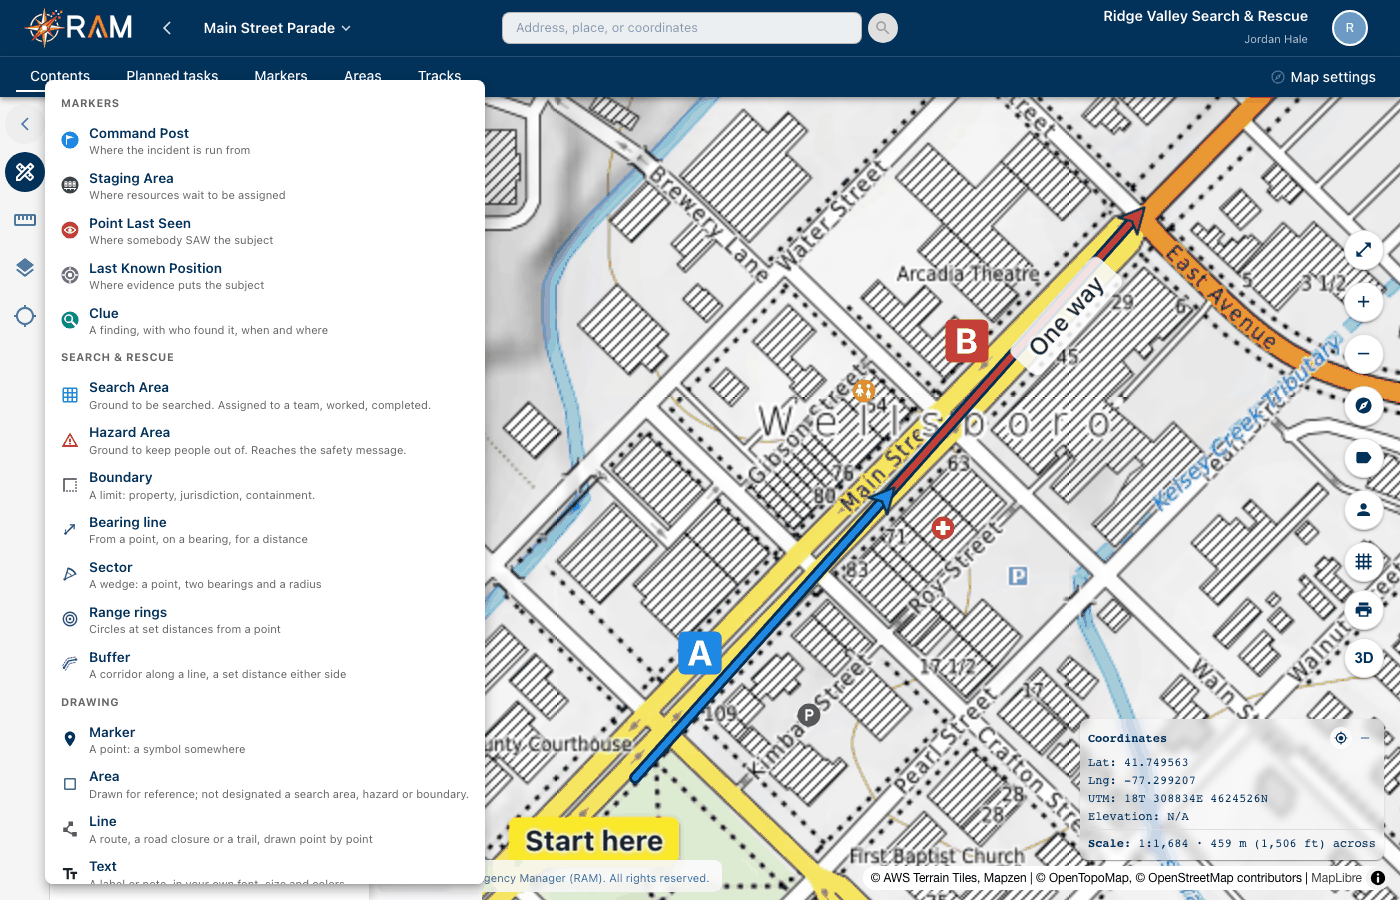
A map has only one Command Post, one Point Last Seen and one Last Known Position. Choosing one that's already there opens it.
Markers
- Choose Marker, then click the map where it goes.
- Pick a symbol. Enter a word in the search box to find one, such as "hydrant" or "helispot". The Letters & Numbers group has Letter A to Letter Z and Number 0 to Number 10, for labeling sections of a route.
- Give it a name, set the color and size if you want, and select Save POI.
Most markers stay the same size on screen at every zoom, so they are always easy to find. Letters and numbers work like printed labels: they shrink as you zoom out and grow as you zoom in.
Lines
- Choose Line. Drawing starts at once.
- Click to add each point. Double-click to finish.
- Set the color, width, dash style and fade. Turn on the arrow to show direction, and pick an outline color so the line stands out.
- Select Save Line.
Text
- Choose Text, then click the map where the words go.
- Enter the words. Choose the font, size, bold or italic, the text color and a background.
- Drag the text on the map to move it. Drag its round handle to turn it, or use the Turn slider.
- Select Save Text.
Like letters, text shrinks as you zoom out, the way a label on a paper map does. Text too small to read is hidden until you zoom in.
Edit, copy or delete
Right-click a marker or a text item on the map for Edit, Copy and Delete. The same actions are in the ⋮ menu on each row in Contents.
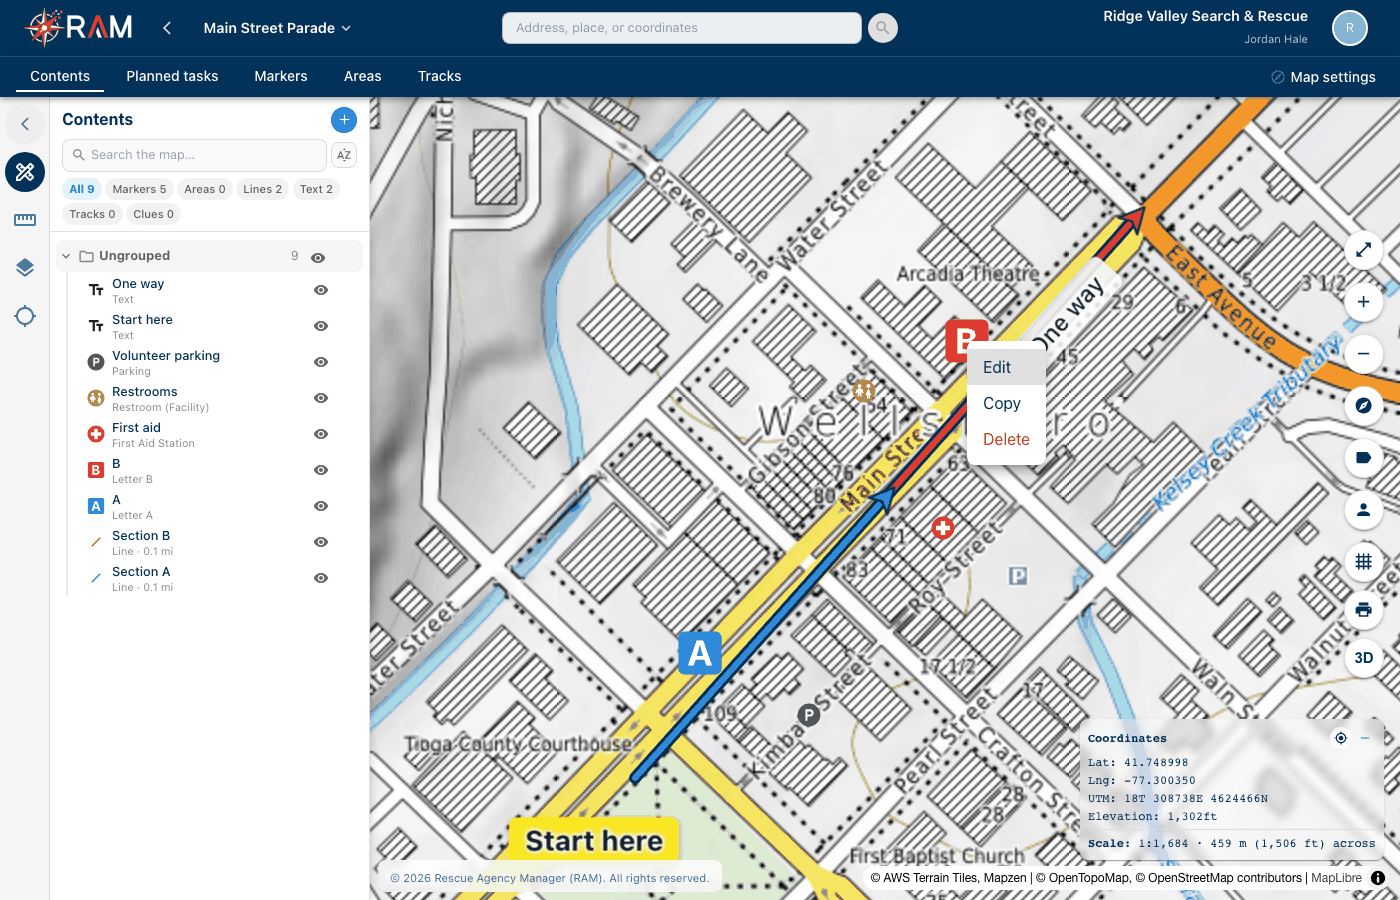
To copy:
- Choose Copy. A message says "Click the map where the copy goes."
- Click the map. The edit window opens with the copy filled in, named "… (copy)".
- Change the name if you want, then Save. Cancel makes nothing.
Delete asks first. A deleted marker cannot be brought back. Deleting needs Create / Edit map content.
The Command Post, Point Last Seen and Last Known Position cannot be copied, because a map has one of each.
The Contents panel
Contents lists everything on the map. Use the chips at the top to show only Markers, Areas, Lines, Text, Tracks or Clues, or enter a name in Search the map….
- Select the eye on a row to hide or show that item.
- Drag rows into folders to organize them. Select Folder in the add menu to make one.
- Use the ⋮ menu on a row for Zoom to, Details, Move to folder…, Edit, Copy and Delete.
- Restrict access… limits who can see a sensitive marker, such as a subject's home. Admins always have access.
Crowded maps
When you zoom out, markers that would sit on top of each other are grouped into a numbered bubble. The number counts everything in that spot, including small drawings. Click a bubble to zoom in to it.
At street-level zoom and closer, markers are no longer grouped. Markers on exactly the same spot spread out in a small ring, so you can select each one. Their saved positions do not change.
The buttons on the right
| Button | What it does |
|---|---|
| Expand | Full screen |
| + / − | Zoom in and out |
| Compass | Turn the map back to north |
| Label | Show or hide marker names |
| Person | Show or hide the names of people being tracked |
| Grid | Show or hide the coordinate grid |
| Printer | Print to scale |
| 3D | Show the map in 3D |
Layers
Select Map Layers in the left bar.
- Base maps: tick one or more. Use Fade to see the one below, and drag them to change which is on top.
- On the map: Terrain shading, Roads & trails, Weather radar and Weather alerts.
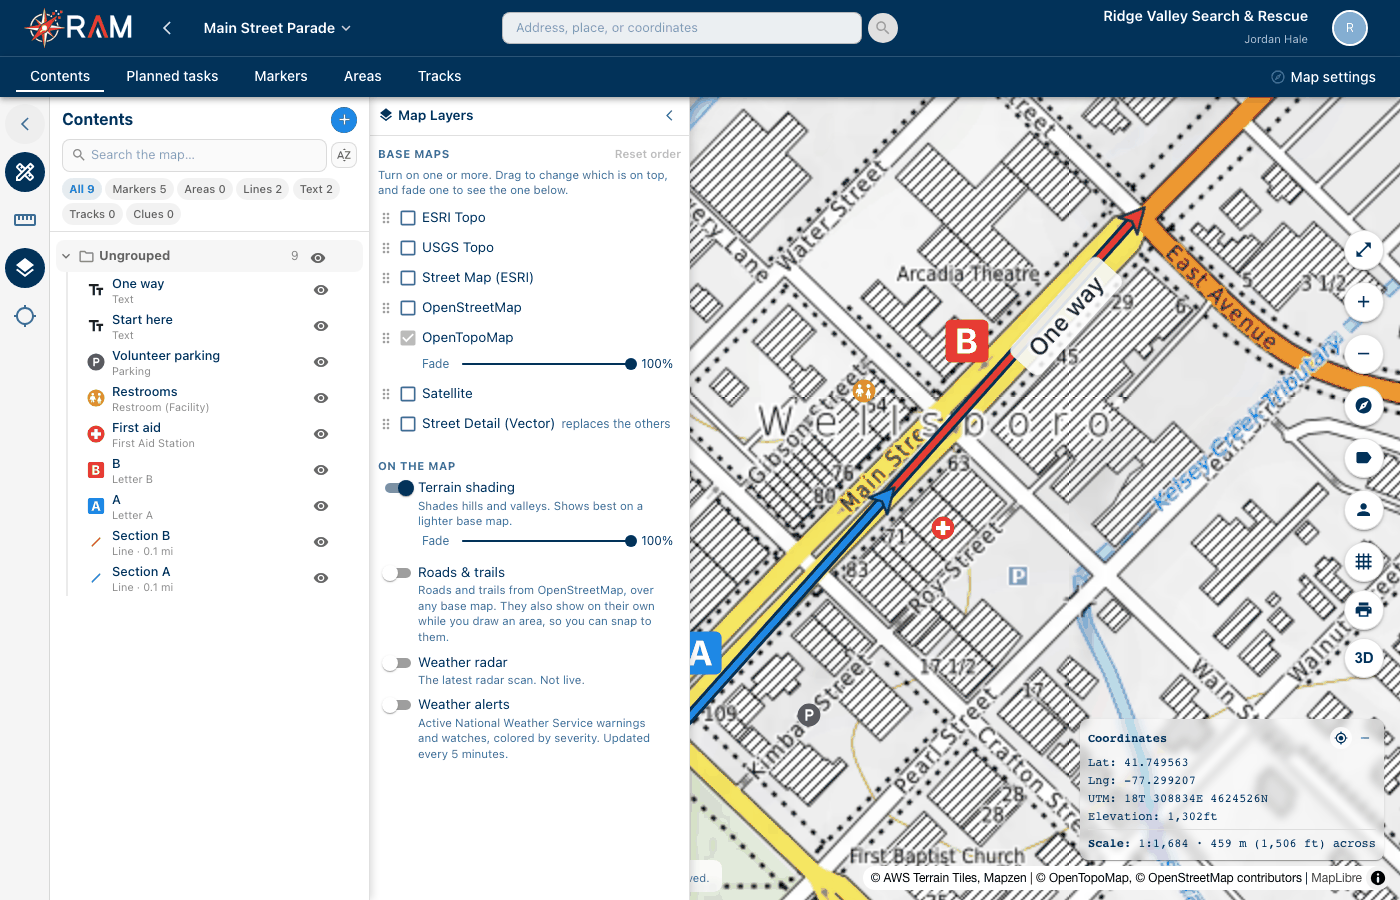
The layers you choose are saved with the map, so everyone sees the same view.
Grid
The grid button draws a coordinate grid that matches the map's main coordinate format. UTM draws UTM squares, MGRS / USNG draws USNG squares, and degrees draw latitude and longitude lines. The Coordinates box names the grid and its spacing.
3D
Select 3D to raise the hills and buildings to their real height and tilt the map. Right-drag (or Ctrl-drag) to tilt and turn. On a phone, use two fingers. Select 3D again to go back to flat.
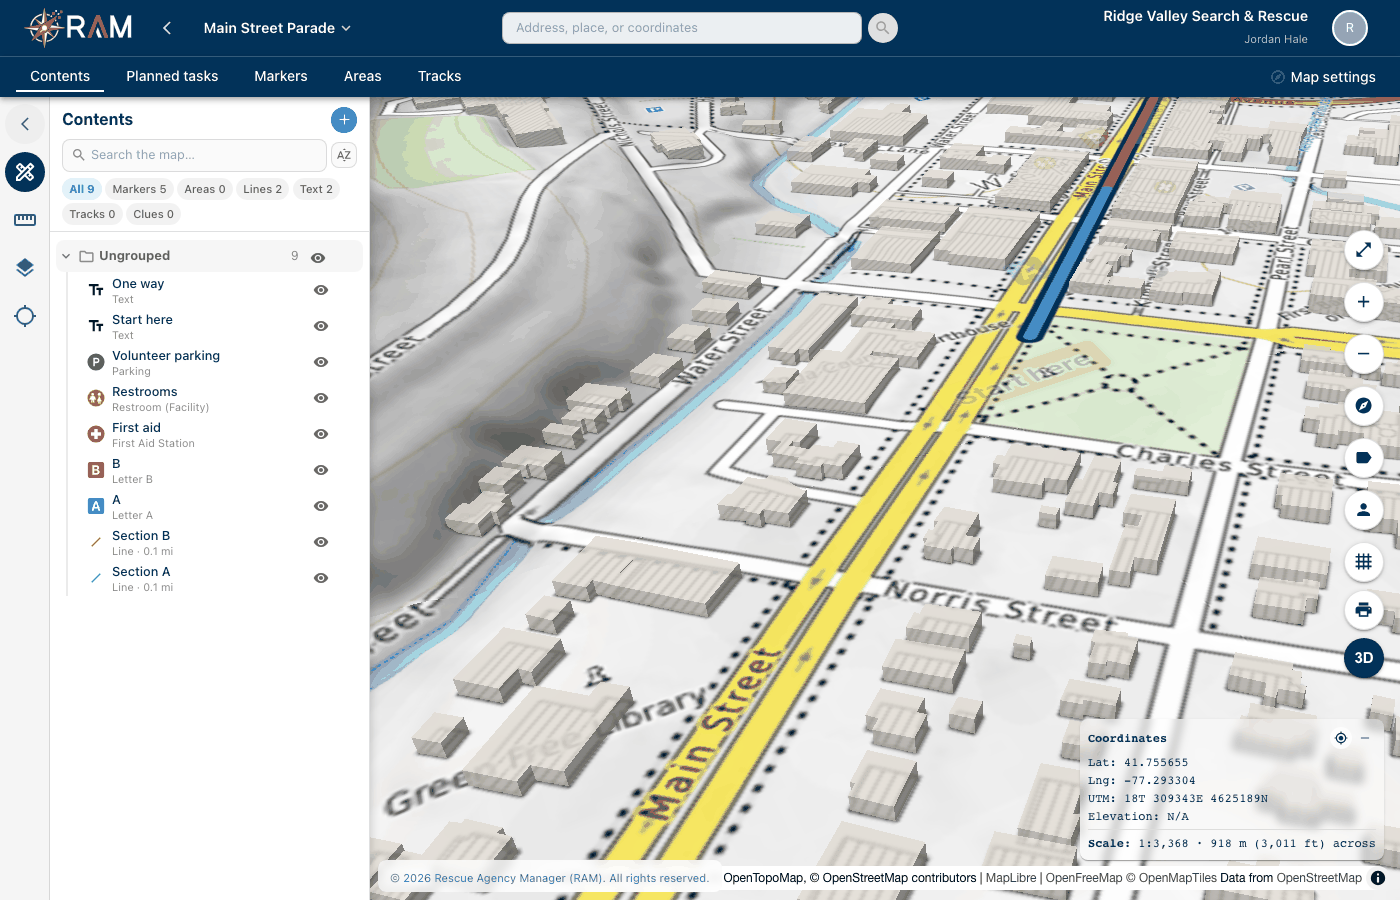
- Markers, lines and text lie flat on the ground.
- While you draw a shape, the map goes flat so your clicks land where you expect.
- Up close, the map keeps the view above the ground and rooftops, so it may stop zooming in a little sooner than it does flat.
- 3D is only a way of looking. Printing, measuring and coordinates aren't affected.
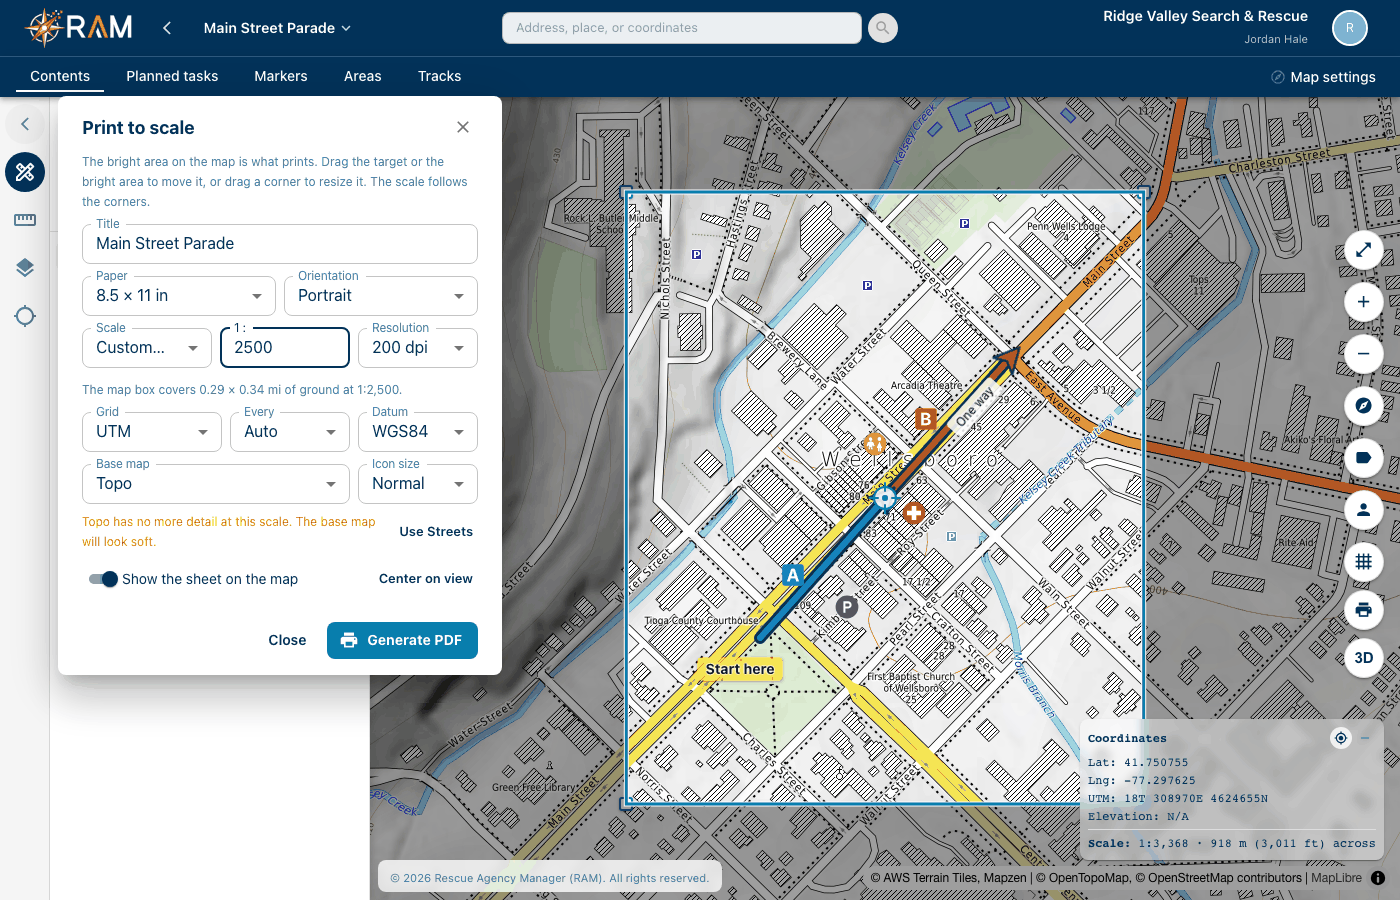
Print to scale
Select the printer button, or Print to scale… in the map menu.
- Choose the Paper, Orientation and Scale, such as 1:24,000.
- The map outside the sheet darkens. The bright area is what prints. Drag the bright area or the round target to move it, or drag a corner to resize it. Custom… lets you enter any scale.
- Choose the Grid, Base map and Icon size.
- Select Generate PDF.
The sheet prints markers, lines, areas and text the way they look on screen, with a scale bar, north arrows and the grid's coordinates around the edge.