Running an Incident
Every incident is run from its command console. The console has a tab for each part of the work: who is on scene, who fills which position, what each team is doing, the ICS forms, and the record.
To start one, see Starting an incident. Not sure whether you need an incident or an operation? See Operation or incident?.
Opening an incident
- Open Operations in the left menu.
- Use Open, Closed or All to choose which incidents to list. Use the search box to find one by number, name, Incident Commander or place.
- Select the incident. Its command console opens.
The Operations page lists map operations too. To show incidents only, choose Incidents in the type filter.
The command console
Across the top, the console shows:
- the incident's name and number, and its status: Active, Suspended or Resolved
- End incident while the incident is active, or Resume and Resolve while it is suspended
- the Actions menu
- the current Period, when the incident Started, and how long the period has been running
- a Full screen button
The tabs are, in order: Dashboard, Subject (search incidents only), Check-In, Organization, Tasks, Communications, ICS Forms, Log, Media, Files and Ops-Map. Settings sits on the far right.
A number on a tab means something there needs attention. The Tasks tab shows how many teams are in the field, and blinks when a PAR check is overdue.
To go back to the Operations page, select the back arrow beside the incident's name.
Dashboard
The dashboard shows where the incident stands. Nothing is edited here.
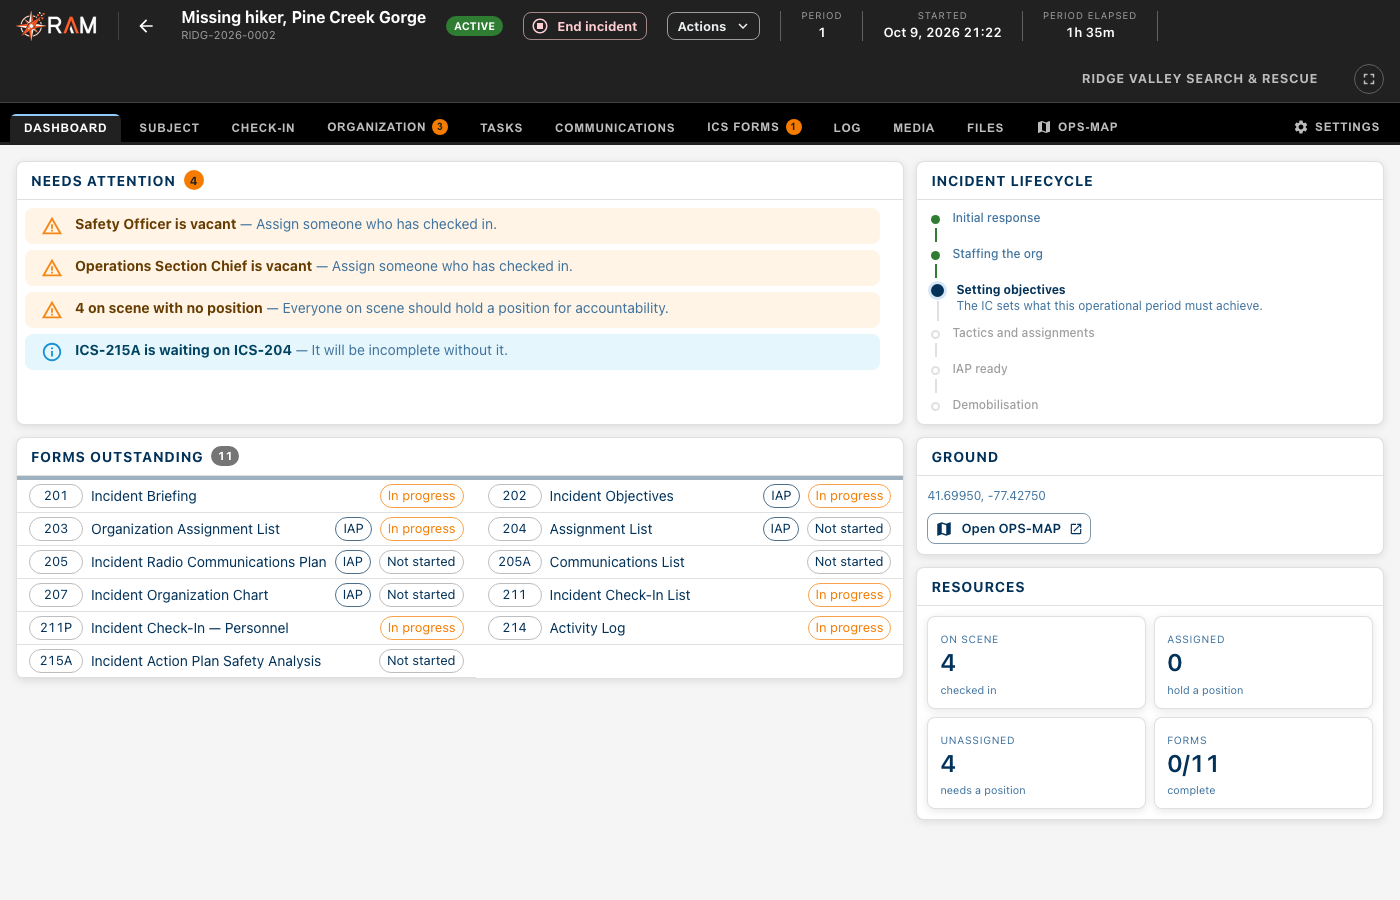
- Needs attention lists what to do next, such as "Nobody has checked in", a vacant position, or an overdue PAR check.
- Incident lifecycle shows which stage the incident is at, from Initial response to Demobilisation.
- Forms outstanding lists the forms still to finish. Select Show all to see the finished ones too.
- Ground has Open OPS-MAP, which opens the incident's map full size in a new browser tab.
- Resources counts who is On scene, Assigned and Unassigned.
Subject
The Subject tab shows on search incidents. It holds the Lost Person Questionnaire for each missing person.
Adding a subject
- Open Subject and select Add New Subject.
- Work through the steps: Identity, Last Seen, Clothing & Equipment, Trip Plans, Medical, Experience & Personality, and Contacts & Notes. Select Next after each one.
- Select Save now at any point to keep what you have entered.
Working with a subject
On the subject's card, select:
- the PDF icon to open the questionnaire as a PDF
- the pencil to edit the questionnaire
Select Blank form to print an empty questionnaire to fill in by hand.
Filling in the questionnaire takes Collect and edit lost-person questionnaires access. The Medical step takes the version of that access that includes medical details. Only an agency admin can delete a subject.
Check-In
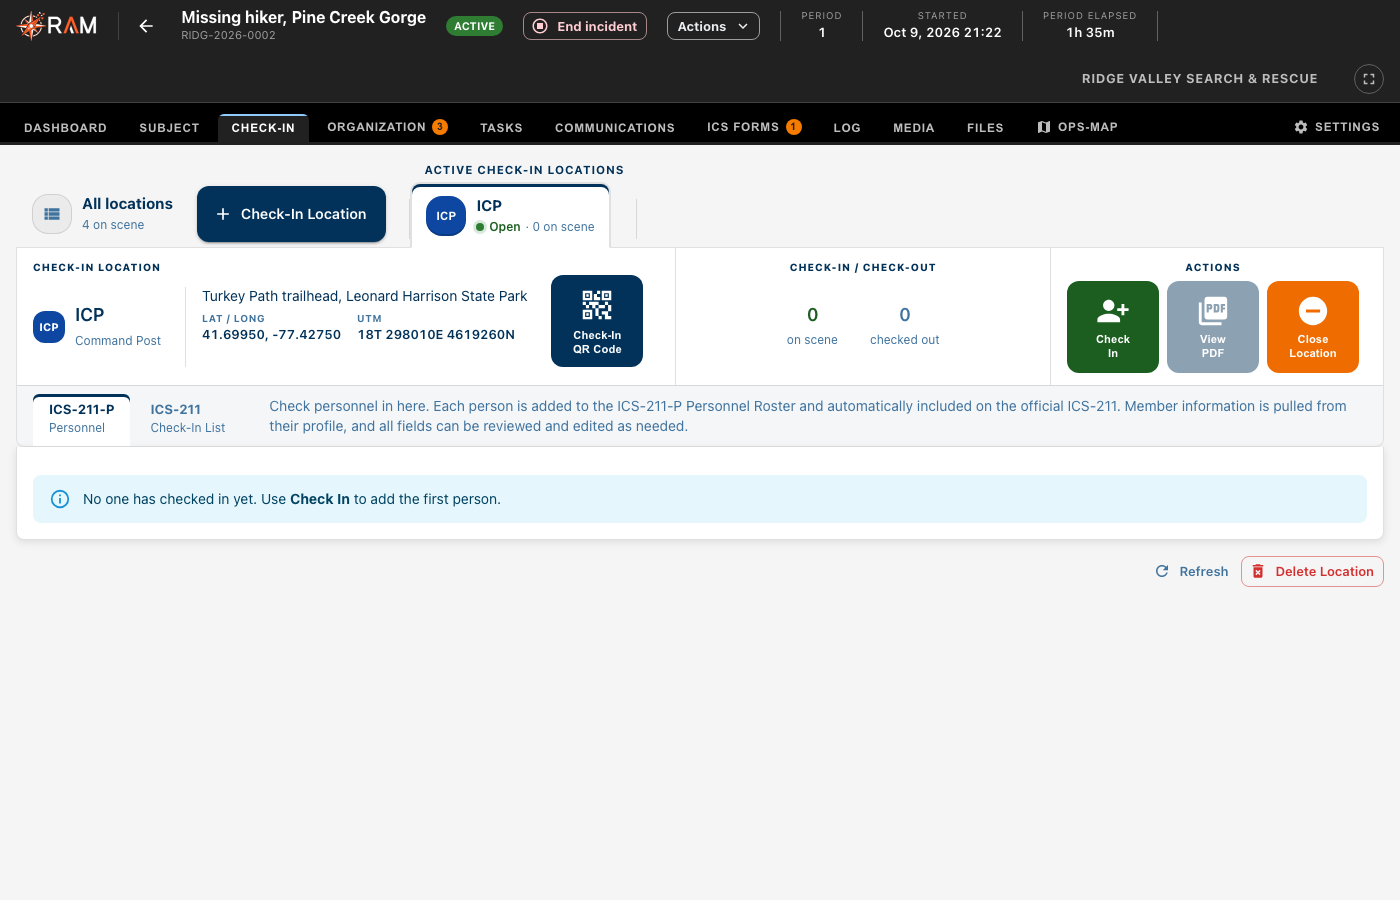
The Check-In tab is where people arrive and leave. Each check-in location, such as the command post or a staging area, has its own tab, its own sign-in sheets and its own QR code.
Adding a check-in location
- Open Check-In and select Check-In Location.
- Choose the Check-In Location Type: ICP, Staging Area, Base, Helibase or Other.
- Enter the Check-In Location Name, and an address or description.
- Enter the Latitude and Longitude, or select Drop pin here to place it on the map.
- Select Add Location.
Select All locations to see every location at once.
Letting people check themselves in
On the location's tab, select Check-In QR Code. People scan it with their phone to check in. Select Refresh to make a new code.
Checking a person in
Each location has two sign-in sheets: ICS-211-P / Personnel for people, and ICS-211 / Check-In List for people and teams.
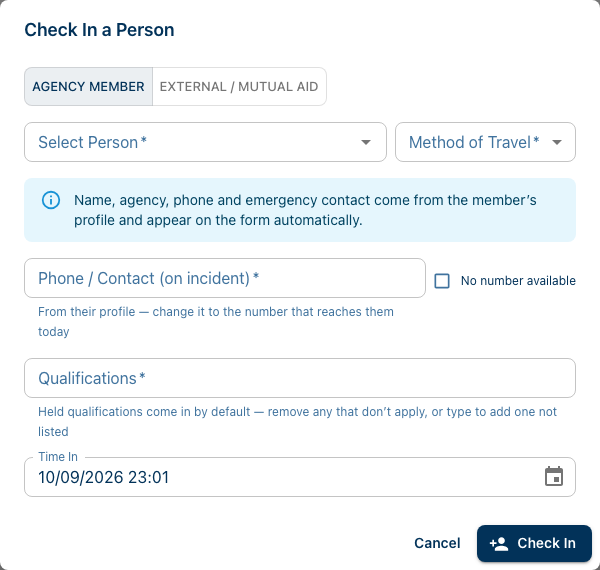
On the ICS-211-P / Personnel tab:
- Select Check In.
- Choose Agency Member or External / Mutual Aid.
- For a member, choose them under Select Person and enter their Phone / Contact (on incident). For someone from outside, enter their Name, Agency, Phone and emergency contact.
- Enter their Method of Travel and Qualifications. Check the Time In.
- Select Check In.
On the ICS-211 / Check-In List tab:
- Select Add Entry.
- Choose Person or Team / Resource.
- Fill in the fields you use. For a team, enter the Team / Resource Name, Leader's Name and # Personnel.
- Select Add to ICS-211.
Changing a check-in
Use the icons on the person's row:
- Edit details to correct what was entered
- Edit times to correct when they checked in or out
- Check out when they leave
- Check back in if they return
Closing a location
When everyone has checked out, select Close Location on the location's tab. You can't close a location while anyone is still checked in there.
Select View PDF to print a location's sign-in sheet.
Organization
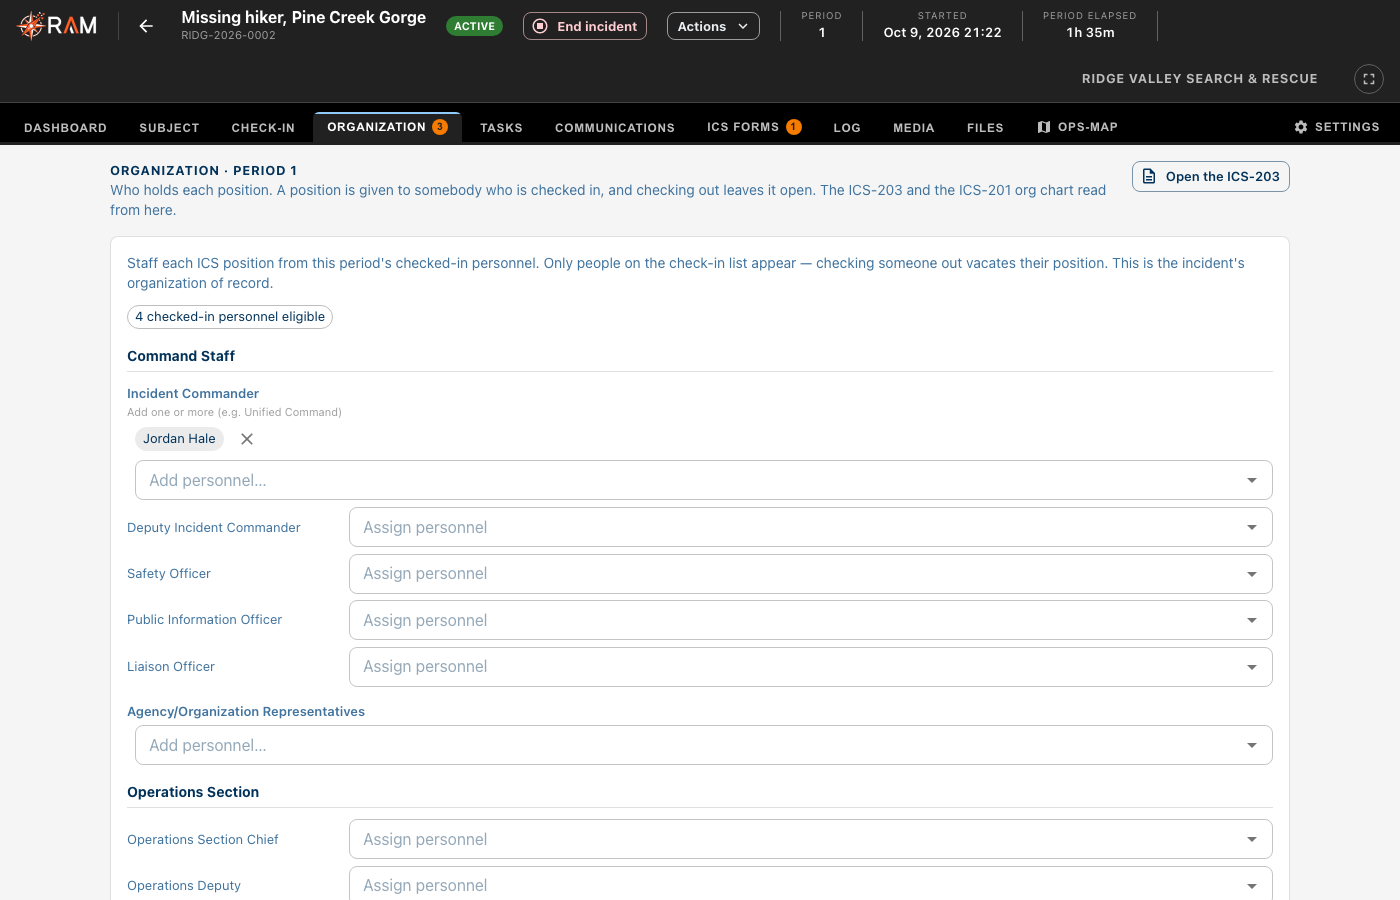
The Organization tab is the incident's org chart for the current period. It fills in the ICS-203.
- Open Organization.
- Find the position under Command Staff, Operations Section, Planning Section, Logistics Section or Finance/Administration Section.
- Choose a person with Assign personnel. It saves as soon as you pick.
For positions there can be more than one of, such as a branch or a division, choose a person with Add personnel… and give the position a name, such as "Branch I". Select ✕ to remove someone.
Only people checked in on the current period can be picked. Select Open the ICS-203 to see the form.
Tasks
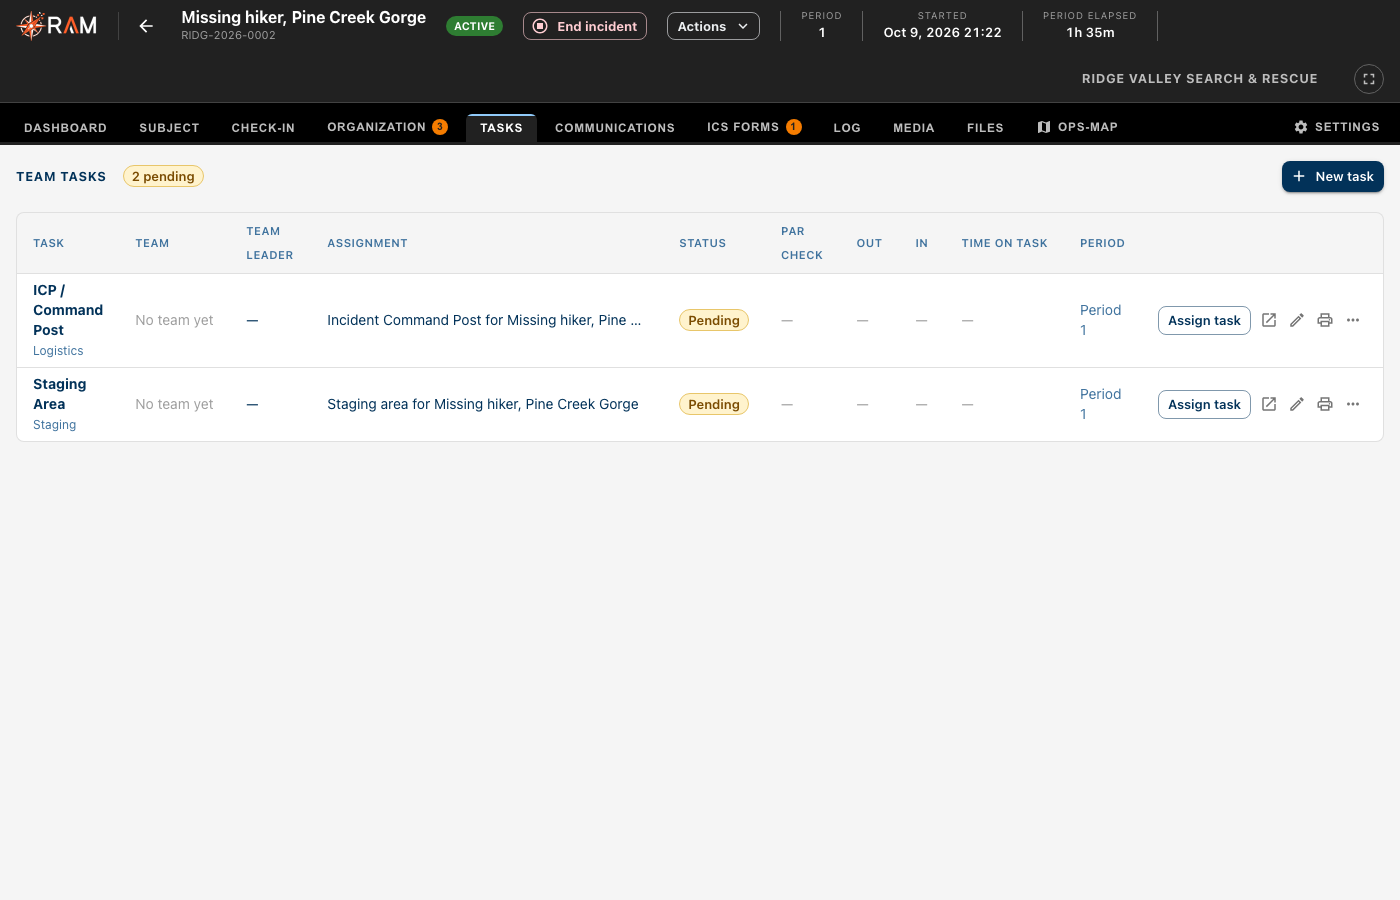
The Tasks tab lists every team task. Tasks work the same way as on a map operation, with a few more fields.
Creating a task
- Open Tasks and select New task.
- Enter the Task title, Task type, Priority, Search area and Instructions.
- If you use them, enter the Division, Dispatcher, Terrain and Sweep width (m), and how the task was Assigned.
- Enter the Team callsign and choose the Team leader and members. Only people who are checked in can be picked.
- Enter the Team channel and any Phone numbers.
- Select Assign task, or Save draft to keep it as Pending.
Running a task
| Status | Button | What happens |
|---|---|---|
| Pending | Assign task | The team is set and ready to go |
| Assigned | Start task | The team is out. The time out is recorded |
| In Progress | Complete task | The team is back. The time in is recorded |
Recording the debrief
- Select Edit task on the task's row. Once the task has started, it reads Times and debrief.
- Enter the Time out, Time in and the Debrief. On an incident you can also record the Debriefing officer, Vehicle miles, and the team leader's POD with Why that POD.
- Select Save changes.
PAR checks
Select the PAR pill on a task that is In Progress. Enter how many of the team were accounted for and the Team's report, then select Record PAR. If you couldn't reach the team, select No contact.
Other task actions
- View to see the whole task
- Print the task sheet to hand to the team
- Cancel or delete, then Cancel task or Delete task
Completed and canceled tasks are hidden. Select Show completed / canceled to see them.
Communications
The Communications tab is the radio plan for the current period: the ICS-205.
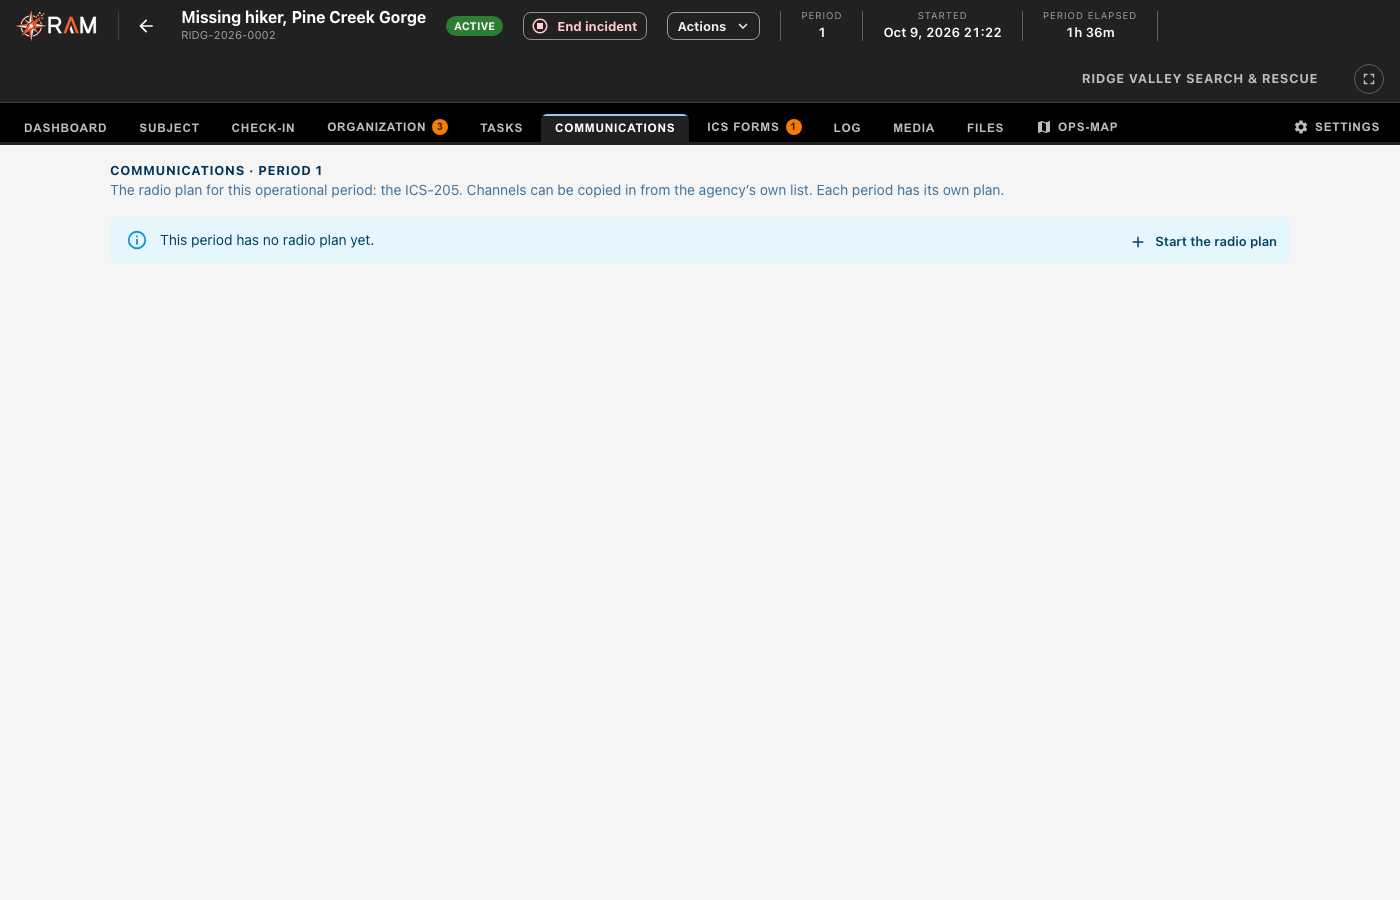
- Open Communications.
- If the period has no plan yet, select Start the radio plan.
- Fill in the form. To add your agency's own channels, select Agency Channels, choose them, and add them to the plan.
The form saves as you type.
ICS Forms
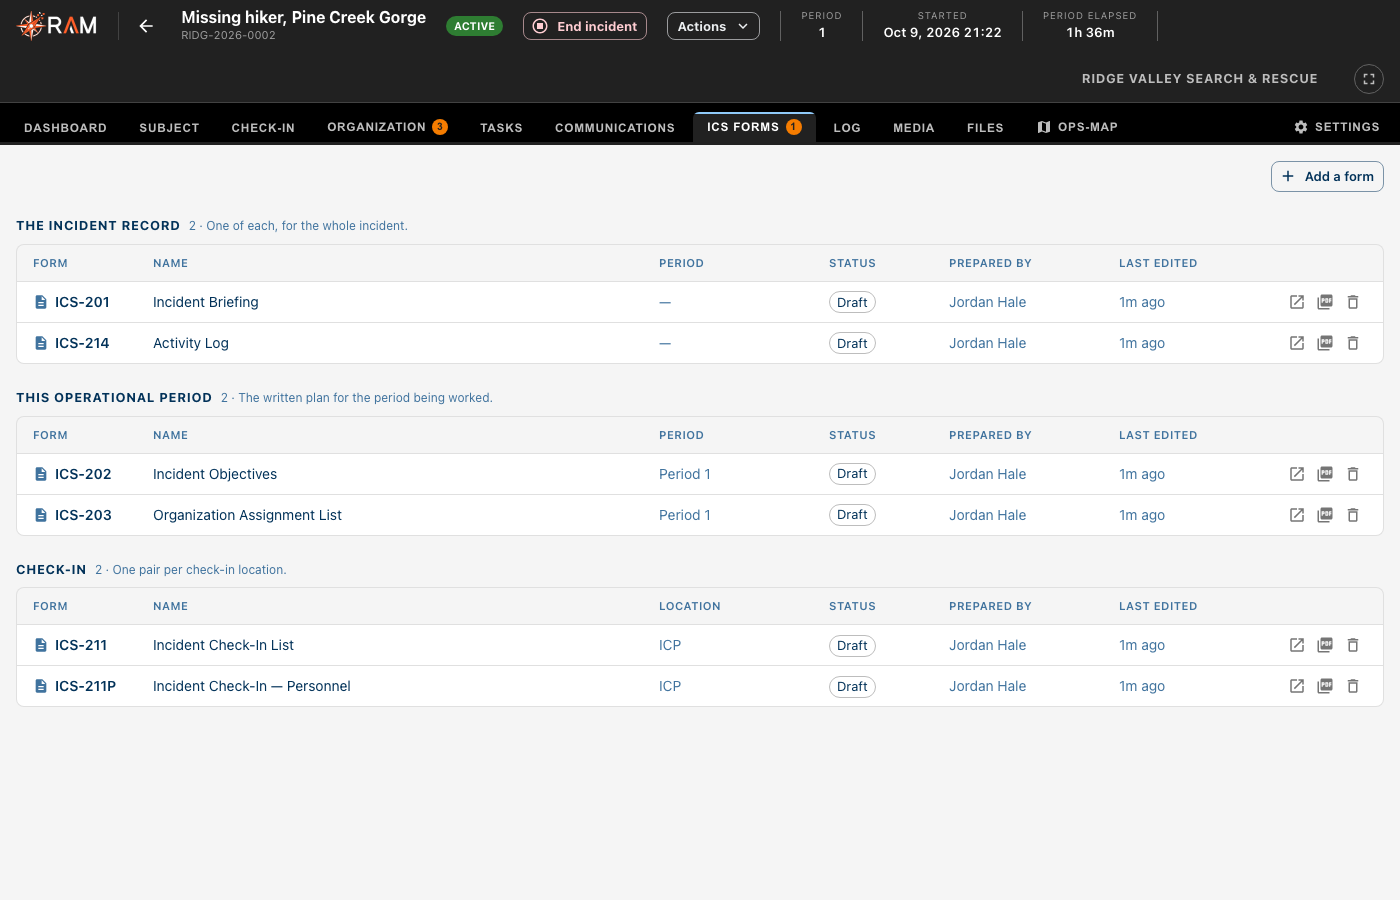
The ICS Forms tab lists every form on the incident, grouped under The incident record, This operational period and Check-in.
RAM creates some forms for you:
- when the incident is declared: the ICS-201, ICS-202, ICS-203 and ICS-214
- for each new period: a new ICS-202, ICS-203 and ICS-205
- for each check-in location: an ICS-211 and ICS-211-P
Your agency chooses which forms it uses in its incident settings.
Adding a form
- Open ICS Forms and select Add a form.
- Choose the form. To see forms your agency has turned off, select Show all forms.
These forms can be added: the ICS-201, 204, 205, 205A, 206, 207, 214, 215, 215A, 218, 221 and 225. The ICS-202 and 203 come with each period, and the ICS-211 and 211-P come with each check-in location.
Filling in a form
- Select Open on the form's row.
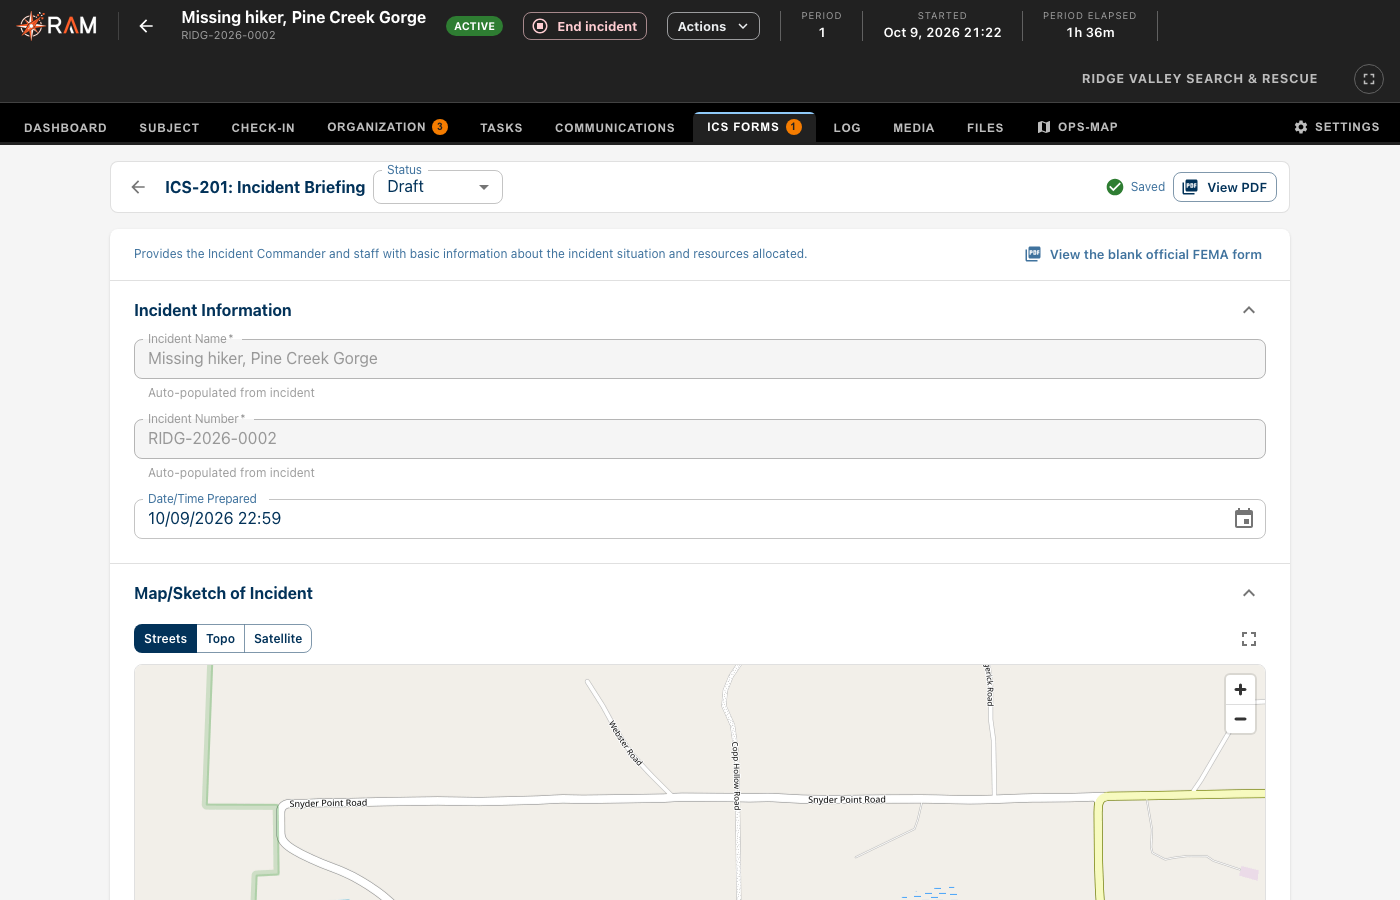
- Fill it in. It saves as you type. Fields that come from the incident, like its name and number, fill in for you and can't be changed.
- When the form is finished, set Status to Approved. This locks it.
Approving the ICS-201 also freezes its org chart and map as they are at that moment.
Printing and deleting forms
- Select Download PDF on a form's row, or View PDF inside the form.
- Select View the blank official FEMA form inside a form to see the original.
- To delete a form, select Delete this draft on its row. Only draft forms can be deleted.
Log
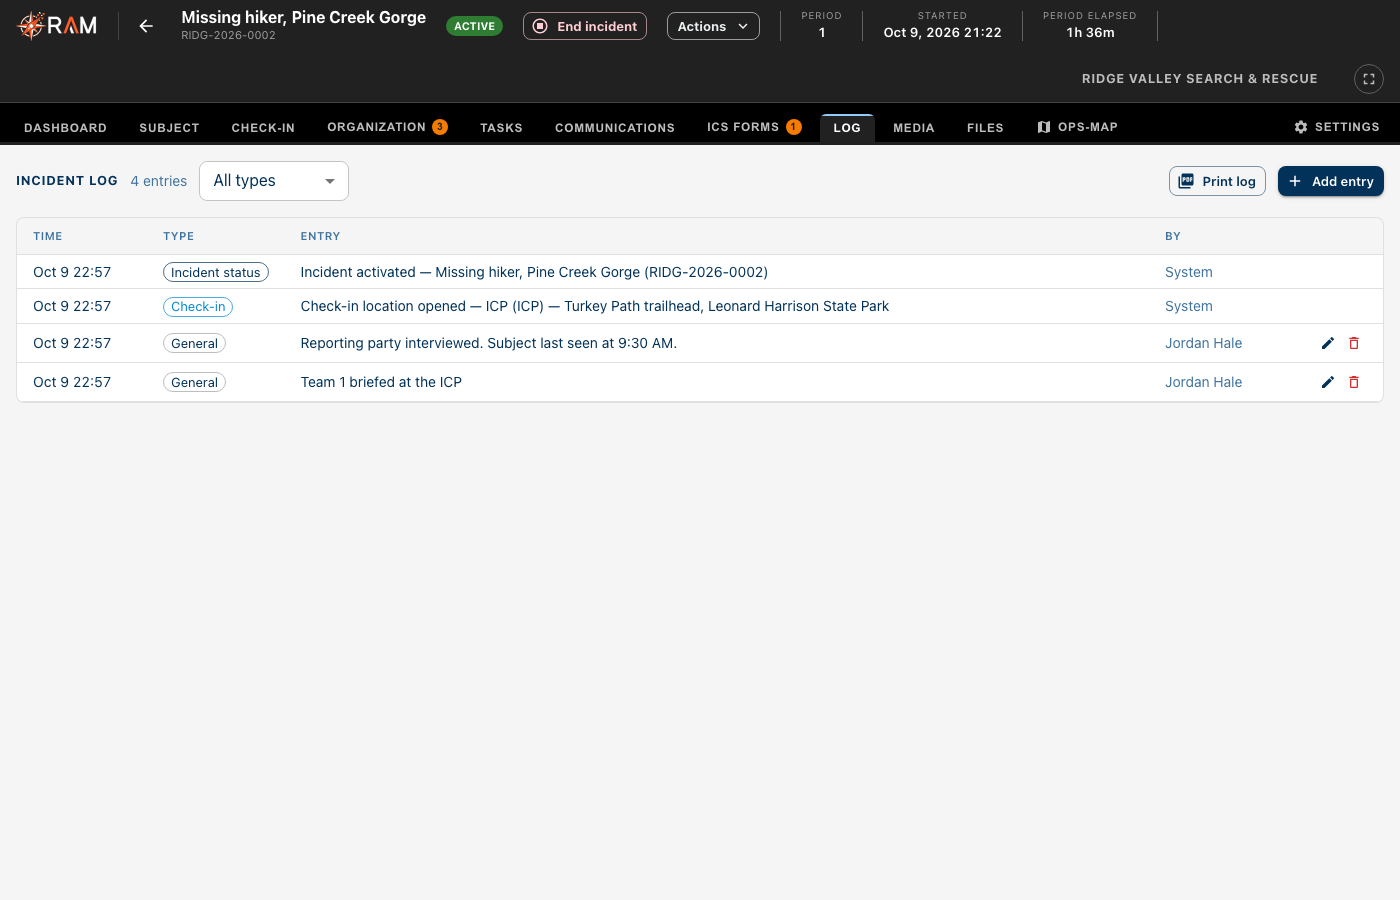
The Log tab is the incident's record of what happened. RAM adds entries for status changes, tasks, PAR checks and check-ins.
Adding an entry
- Open Log and select Add entry.
- Enter the Time, Type and the Entry.
- Select Add.
To change an entry you typed, select Edit. To remove it, select Delete. Entries RAM made can't be changed.
Use the type filter to show one kind of entry. Select Print log to print it as a PDF.
Media
The Media tab shows every photo on the incident in one place: from subjects, tasks, map markers and the incident itself. Use the chips to show one kind.
Select a photo to see it large. From there you can Show on map, Open subject, Open task or Open full size.
Files
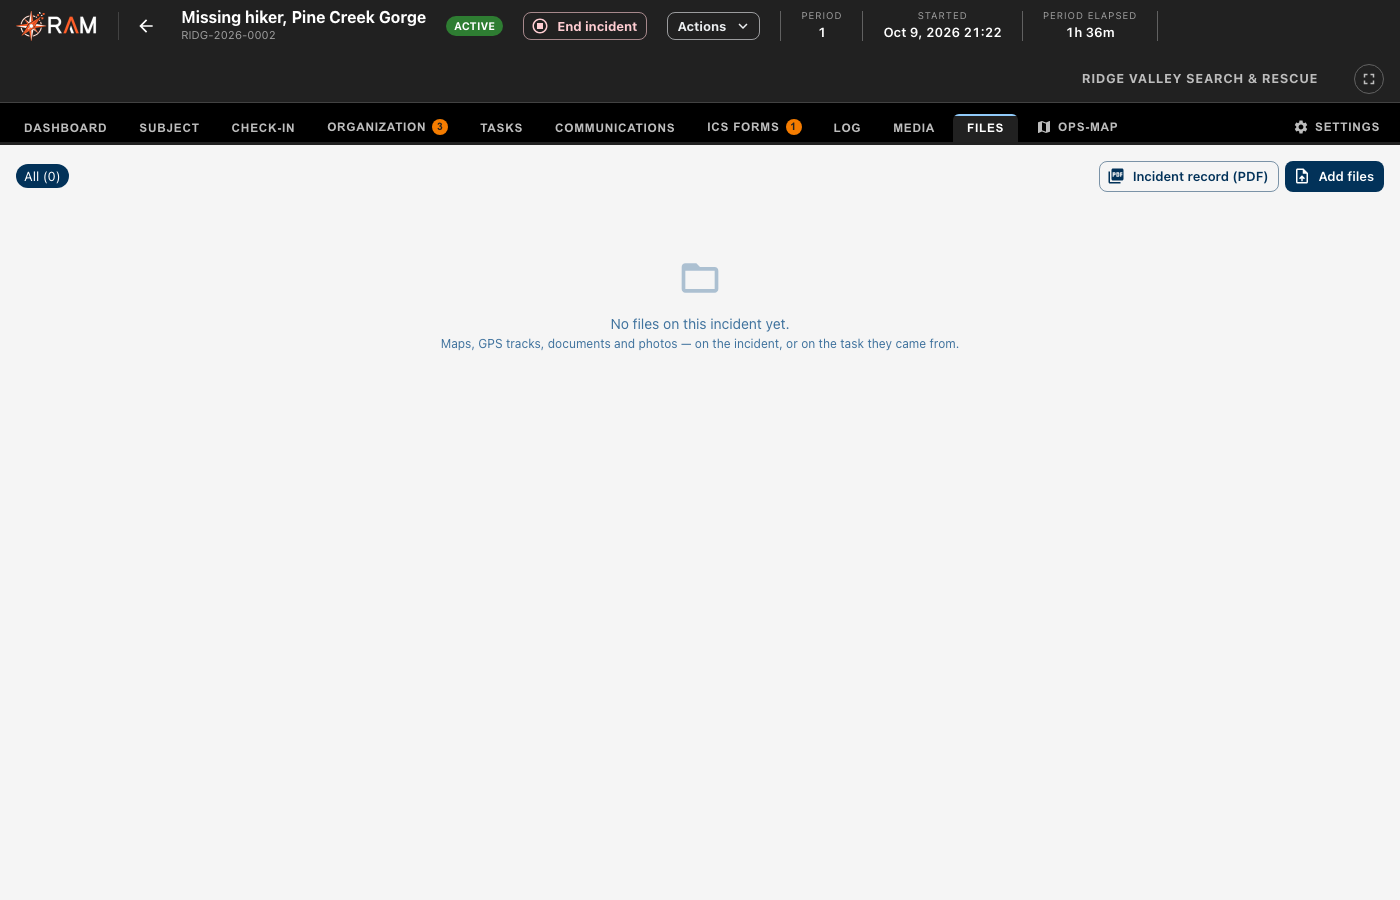
The Files tab holds maps, GPS tracks, documents and photos added to the incident.
Adding files
- Open Files and select Add files.
- Drop files in, or click to choose them.
- For each file, choose its Kind, check its Name, and choose the task it was On if any. Add Notes if you need to.
- Select Add.
On a file's row, select Open, Download, Edit or Remove.
Importing a map file
When you add a map export, such as one from CalTopo, select Review & import on its row. Check what will come in, and import it onto the incident's map.
For a GPS track file, select Say whose track this is to name the member. Use Edit track or Remove track to change it.
The incident record
Select Incident record (PDF) to make one PDF of the whole incident. It includes the summary, the periods, who filled each role, the forms, the subject, the files, the tracks and the audit trail.
Ops-Map
The Ops-Map tab shows the incident's map inside the console. Everything in Working on the map applies here.
On this tab, the Contents, Markers, Areas and Tracks lists are beside the map, and Clues on a search or training incident. People, tasks and the log are on the console's own tabs.
To see the map full size, select Open OPS-MAP on the Dashboard. It opens in a new browser tab.
Settings
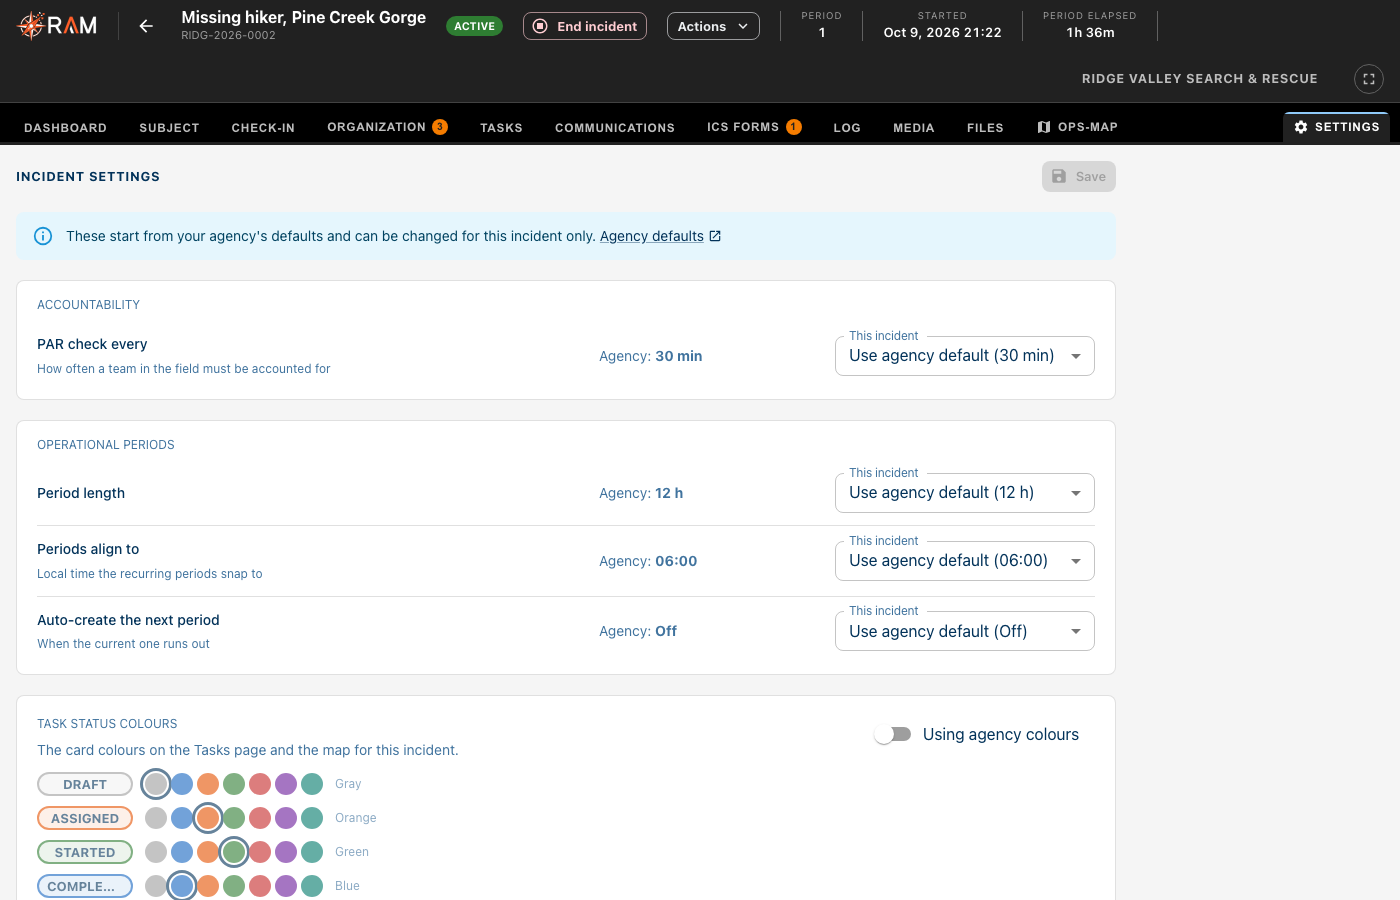
The Settings tab changes how this incident works, without changing your agency's defaults.
- Accountability: how often a PAR check is due, or Off.
- Operational periods: the Period length, when periods line up, and whether the next period starts on its own.
- Task status colours: turn on Set for this incident to use different colors from the agency's.
- Sharing: select Sharing… to share the incident's map with people outside your agency.
Select Save when you are done. Select Agency defaults to change the settings for every new incident.
The Actions menu
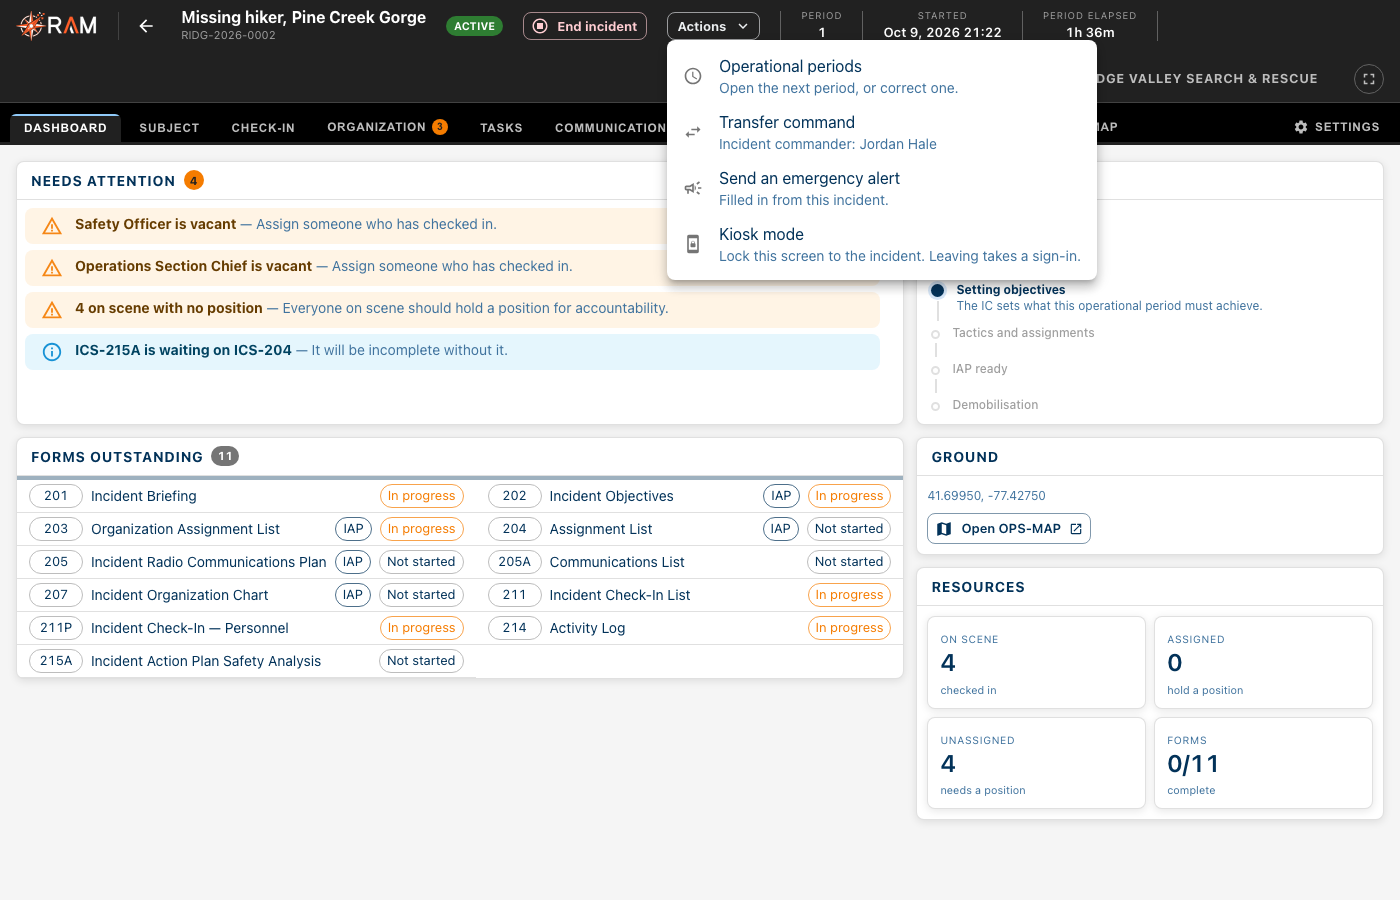
Select Actions at the top of the console.
Operational periods
- Choose Operational periods.
- To change a period, select Edit. Change its Start time, Planned end time or Period objectives, and select Save.
- To start the next period, select New period. Enter its times and objectives. To hand over command at the same time, turn on Transfer of command and choose the New incident commander. Select Open period.
Transfer command
- Choose Transfer command.
- Choose the New incident commander.
- Select Transfer command.
Kiosk mode
Choose Kiosk mode to lock the screen to this incident, for example on a shared laptop at the command post. Leaving it takes a sign-in.
Ending an incident
- Select End incident at the top of the console.
- Choose what to do:
- Suspend to pause the incident. You can resume it later.
- Resolve to close it.
- For Resolve, choose How did it end?, such as Subject located or Training complete. To record an earlier end time, turn on Set the actual time this incident ended and enter it.
- Select Suspend Incident or Resolve Incident.
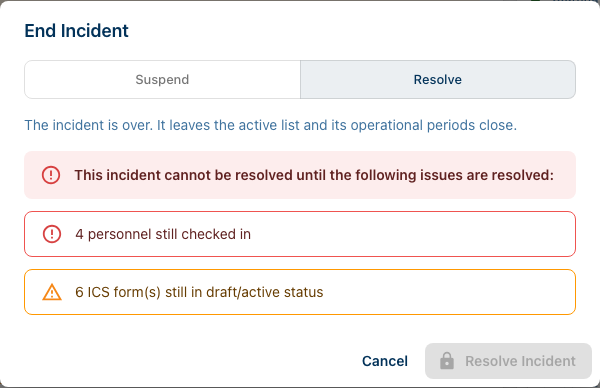
RAM won't end an incident while anyone is still checked in, or while a task is still open. It lists what is blocking it. It also warns you about tasks without a debrief and forms still in draft, but these don't stop you.
Resuming and reopening
- A Suspended incident: select Resume at the top of the console.
- A Resolved incident: select Reopen.
Sealing an incident
Sealing locks a resolved incident's record for good. Only an agency admin can do it.
- Open the resolved incident.
- Select Seal, then Seal incident.
To make a correction later, select Unseal to amend. Enter the Reason for amending and select Unseal. The incident then shows Amended after sealing, with how many times.
A sealed incident can't be reopened.
Archiving an incident
When an incident is suspended or resolved, you can archive it to take it off the Operations page.
- On the Operations page, select the archive icon on the incident's row.
- Select Archive.
Archived incidents are under Archives › Archived Incidents. To bring one back, select Restore there.
Who can do what
| Action | Needs |
|---|---|
| Open an incident, and read its forms and log | View incidents |
| Declare an incident | Create incidents |
| Add, fill in, approve and delete draft ICS forms | Manage incident check-ins or Edit incidents |
| Add, edit and remove log entries | Manage incident check-ins or Edit incidents |
| Check people in and out, and edit their times | Manage incident check-ins or Edit incidents |
| Add and close check-in locations | Manage incident check-ins or Edit incidents |
| Fill positions on the Organization tab | Manage incident check-ins or Edit incidents |
| Add files, change settings, transfer command, edit a period | Manage incident check-ins or Edit incidents |
| Fill in the subject questionnaire | Collect and edit lost-person questionnaires |
| Tasks, clues, tracks and the map | The map access levels. See Running an operation |
| End, suspend, resolve, resume and reopen | Close incidents |
| Archive | Delete incidents |
| Restore from the archive | Manage archived incidents |
| Seal, unseal, delete a subject, rename or delete a check-in location | Agency admin only |
After an incident is resolved, only an agency admin can change it. Once it is sealed, nobody can until it is unsealed.